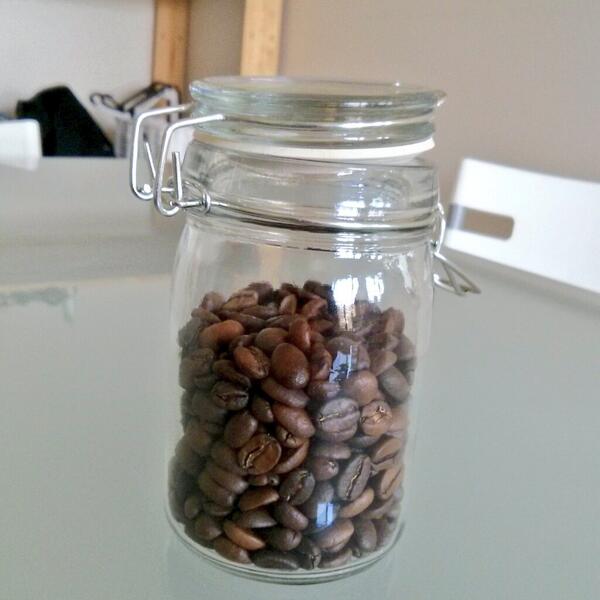
If you follow me on Twitter (and you should), you will know that since about 3 months ago, I started roasting my own coffee. Yes, my coffee madness has culminated over the years to this. This was my first roast:
Since then I have roasted 16 batches. The variables I vary are: temperature, time, pre-roast mass, and technique. I use a regular $10 popcorn popper from KMart to roast my beans (I originally wanted to purchase a Behmor, but I decided that I should stay lean while learning how to roast coffee) – and I have a thermometer to roughly gauge the temperatures of the popcorn popper. Eventually I’ll hook the thermometer up to an Arduino, but that’s a story for another day.
Despite all the controls, I had problems with my roasts. They were okay to drink – not as bad as buying supermarket coffee, but they weren’t excellent. The main problem was consistency. My roasts were not consistent – some beans were darker than the others. Here were the factors that caused the beans to be inconsistently roasted:
- Different sized beans – Can’t do much here.
- Uneven heating – various causes:
- Popcorn popper too hot
- Popcorn popper doesn’t agitate the beans fast enough (too heavy? too light?)
- Popcorn popper doesn’t agitate the beans randomly enough
- Location of beans in popper
I eventually narrowed it down to the fact that the popcorn popper was too hot – it burns some beans before they could be agitated out. In fact, after the first two throwaway attempts of the roasting, I realized that 7 minutes or so in a popcorn popper as recommended by amateur roasters on the Internet would just burn my beans.
I did a quick lookup, and true enough, most amateur roasters on the web are Americans (or live in America). Are American popcorn poppers different?
Why Do American Popcorn Poppers Heat Slower?
In my previous article about the cost of kettles, amongst the many responses about the kettle is that Americans don’t use electric kettles because they heat up too slowly. I assume this is the same for American popcorn poppers. In the case of roasting coffee, this is a desirable quality.
The reasoning is simple enough and can be encapsulated in this formula: [latex]P = VI[/latex]
The power of an electrical device is a function of the voltage and current it receives. The voltage in Australia is 240V, while the voltage in the US is 110V. Given that most kettle cables are only built to draw ~10A* In the US, kitchen appliances do have 15A plugs. Typical power ratings of kettles in US is 1800W. I’m using 10A as a common ground explanation – plus it’s easier to do math when the multiplicator is 10. from the source, this gives a maximum power of 2300W in Australia while the US have appliances that draw a maximum of 1100W. Higher input mean that the heating elements, which presumably use some sort of Joule heating mechanism, would heat faster than when the input power is lower.
This is why kettles in US heat water slower than the rest of the civilized, tea-drinking world* I say this, but the fact is 110V AC is much much much safer than 230V AC. It’s current that kills. Given [latex]V = IR[/latex], and the typical human skin has electrical resistance of ~100kΩ, the higher voltage will cause higher current to flow through the puny human’s body, leading to electrocution. . This is also a problem for me because my popcorn popper was heating too quickly.
Other Techniques
So I tried other techniques. The first method I tried was with a step-down voltage transformer. The lesson learnt there is: don’t buy crappy $9 step down voltage converters from ebay. They did absolutely nothing. I’m convinced they’re duds.
I then decided to use the good old method of turning the popcorn popper off when it got too hot. Then keep stirring the beans in the heated popcorn popper until it cooled down somewhat, before restarting the popper. This is repeated until the second crack is heard. That got me somewhere, but still the roasts were very uneven across the beans. There were many roasting defects (beans with craters, and tipping aplenty) – on average about 10% of the beans had defects of too much heat while about 5% of the beans were underroasted (yes, I counted my beans. I am literally a bean counter).
Later down the line, I decided a good idea was to cool the entire popcorn popper while roasting. This entailed me bringing out a giant fan to blow on the popper. It also had the advantage of blowing the chaff away, so less work cleaning up for me. The results improved again – a reduction of defective beans (not by much, and the sample size was too small, but my gut tells me it was statistically significant).
Inspiration Strikes
Yesterday morning as I was writing my book – Underhanded Javascript (or its alternate title – <a href=“https://leanpub.com/jsinterviewquestions?utm_source=Blog&utm_medium=Blog&utm_term=CoffeeRoasting&utm_campaign=BlogCoffeeRoasting” title=“JavaScript Technical Interview Questions”" title=“JavaScript Technical Interview Questions” target="_blank">Javascript Technical Interview Questions), an idea came to me while thinking about having breakfast at Double Roasters – something I had not done since early this year (and seriously, if you’re in Sydney, in summer, go try their cold brew. It’s perfect).
Instead of just using a popcorn popper to roast coffee, I wondered what would happen if my beans had been double roasted. Specifically, like cooking meat in sous-vide, roast once under lower temperatures, and roast a second time under higher temperatures. My immersion circulator only goes up to 100°C so that was no good. But I have an oven!
Two Stage Roasting – Stage 1: The Oven
My oven is somewhat uneven in temperature distributions (I had done the checking ages ago when I moved into this place). However, since I was only roasting 66g of beans, this means I can concentrate the beans on a small area while still having the beans lay flat as a single layer.
Here are the beans pre-oven:
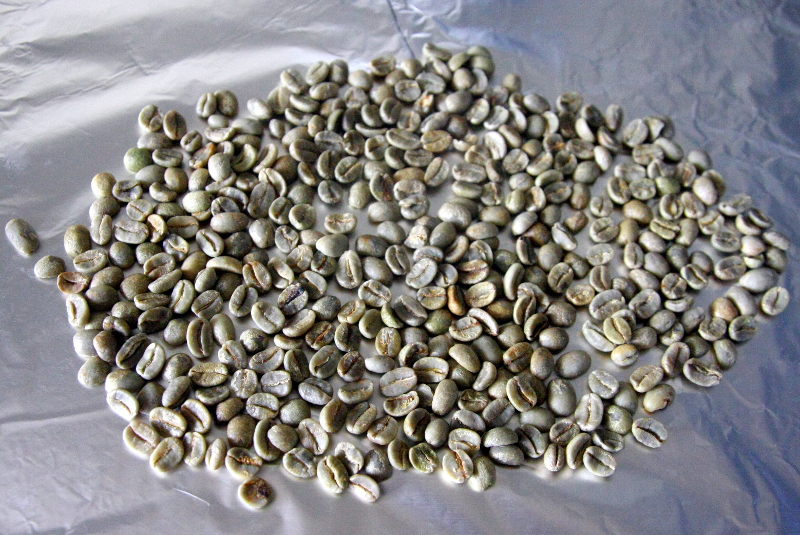
Green coffee beans before puttint them into the oven
The question then becomes what temperature would be the right temperature? I want the beans to be heated up to a point just before the first crack, so by the time they are put into the popcorn popper, it’d be just right for the first crack. As usual, I headed back to Sweet Maria’s excellent resource, and decided that 150°C would be the best. But due to the aforementioned inconsistency in temperature distribution in my oven, I set it to 180°C on fan mode. I didn’t actually double check the center temperature, but was only basing my calibration off the last time I checked my oven temperature.
After about 20 minutes, by visual checks (yes, I forgot my oven thermometer), I decided they were ready. Here’s how they look like:
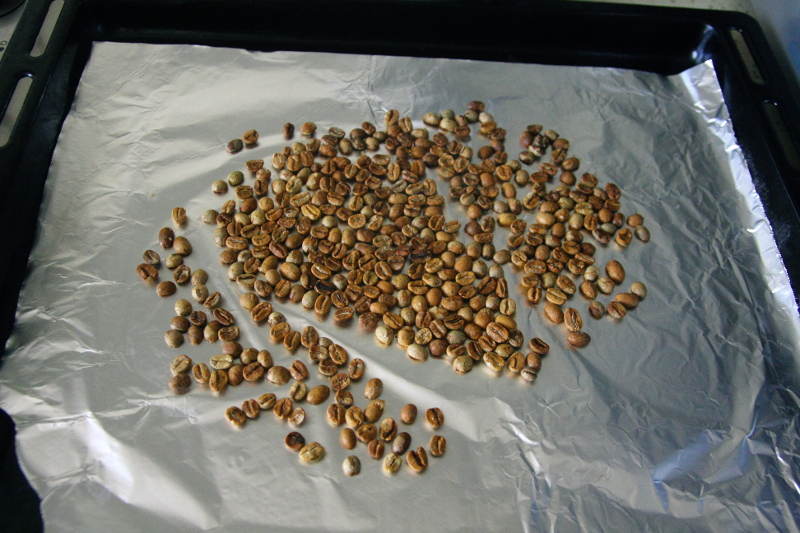
Beans after coming out from the oven
Two Stage Roasting – Stage 2: The Popper
I was lucky of course, what with my careless temperature settings. The beans came out quite nice. The beans that still look green simply have chaff covering them. I quickly transferred the beans into the popper which I had been heating by turning it on for 15 seconds and turning it off for 30 seconds. I continued, but inversely – turning it on for 30 seconds and turning it off for 10 seconds while stirring with a wooden spoon. The fan was blowing at the popper at full speed.
Here’s a picture of the roast in the popcorn popper:
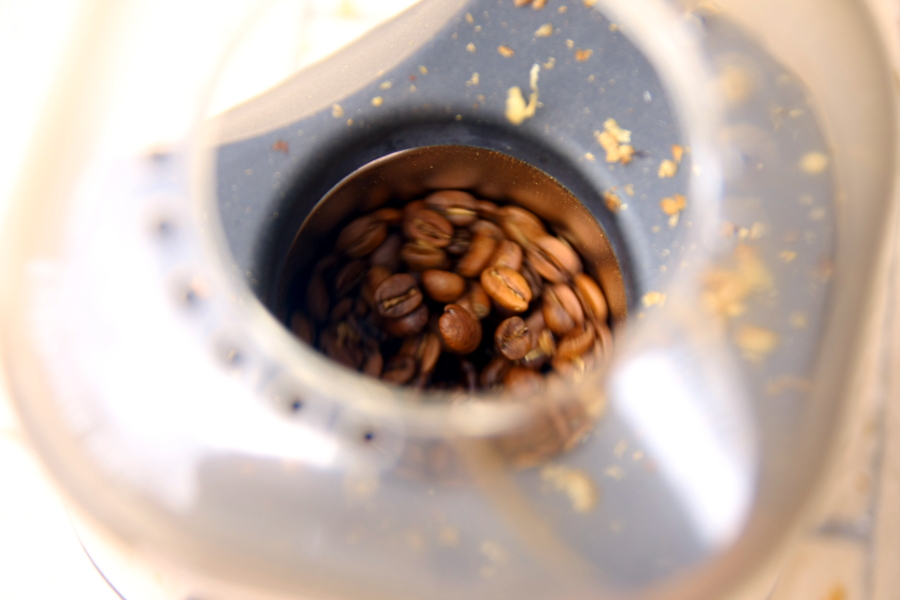
Coffee Beans Roasting in Popcorn Popper
This picture actually accurately illustrates one of the problems I have with the popcorn popper. The beans that are rimwards spin faster widdershins than the beans that are hubwards. I guess this does make sense from a classical mechanics point of view, but I think this also causes the uneven heating. I hadn’t used a thermometer this time around because my mind was otherwise preoccupied with my books.
After about 5 minutes, the beans are done. Here’s how they look like:
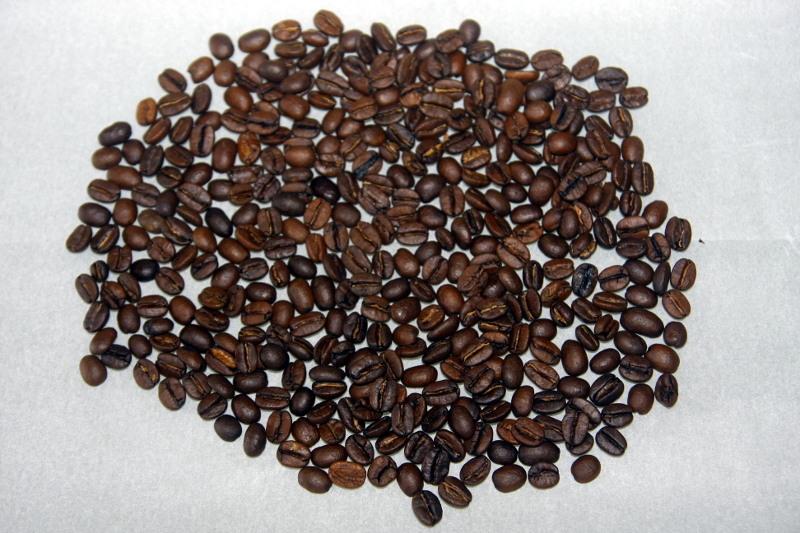
Roasted Beans
Using OpenCV to Measure the Evenness of the Roast
As you can see, the roast is not very even. Some beans are darker, and some beans are lighter. But how inconsistent are they? If only there could be a metric to see how inconsistent they were. Then I recalled I recently did a lot of work with OpenCV. That sparked another idea. I took the photo above, and plotted a colour histogram of just the beans.
Here’s the code. The histogram follows:
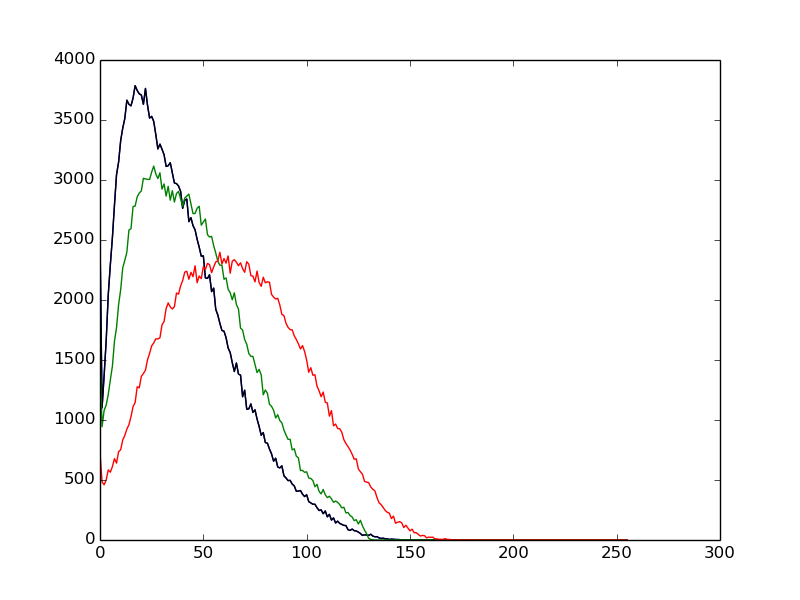
Colour histogram of the beans
If the beans were evenly roasted (and the lighting is even in the photograph) we would expect to see high peaks in all three channels. The “fatter” the body of the histogram, the more inconsistent the roast it. The histogram for the blue channel is a good indicator of the charredness of the beans.
For this batch, I found the histogram to be acceptable – there is quite a bit of variance, but I think they’re okay. I’ve yet to run the same algorithm on my previous batches yet (some of them I took photos of, most of them I didn’t), but I have a feeling those will have fatter bodies yet.
Of course the histogram is subject to the lighting of the photo, and cannot be accurately used as a check for consistency. I’m merely using the colour histogram as a proxy for evenness of the roast. Maybe in the future I will work out a rig to perform computer aided visual tests for my roasts.
Other Metrics
Why am I only blogging about my attempt at roasting coffee after my 18th-ish time? This blog post started mainly because for once, there was only ONE bean that has a crater in it. My first roast went okay (didn’t log anything), but my 2nd to 16th-ish roasts had a lot more errors that I logged. The 4th attempt had 74 defective beans in it, accounting for nearly 40% of the total roast mass.
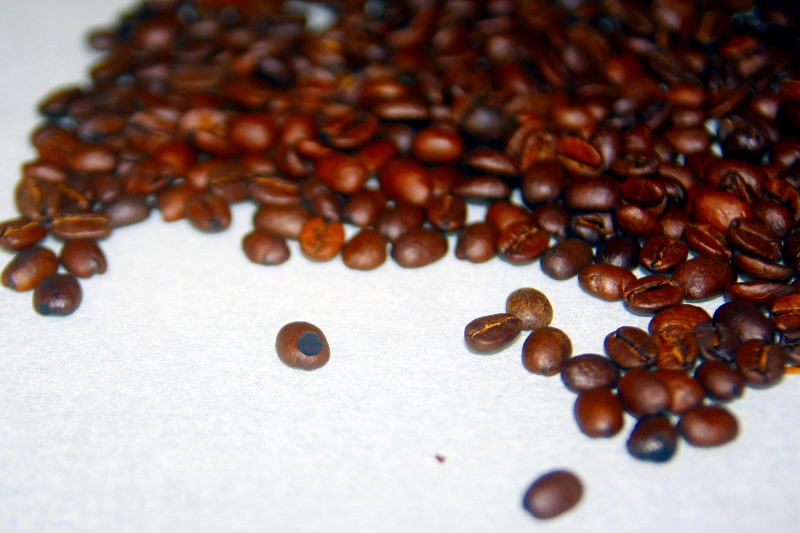
That one defective bean
This is the first time I’m roasting with such few visual errors. And the aroma is excellent too. The previous roasts smelled punky for the first few hours after roasting. Yesterday’s roast smelled like good coffee. Naturally, I could be biased mentally, but hey, taste is supposed to be a subjective thing, right?
The point is, you should try double roasting.
Conclusion
I’ve made myself a cup of Aeropress coffee from this batch despite the standard advice to leave it for 24 hours before consuming. I like it. I think this is the first time since my first roast that I can actually taste the chocolatey flavours of my coffee. There is also a lot more body to the coffee. Needless to say, I’m proud of it. And I’m excited for more.
I finally understand the obsession of roasters over all the variables. When I started roasting I lusted over the Behmor. But after figuring out that there are so many variables to control, I think if I were to get a roasting machine, I’d get a a nice HotTop roaster, though that’s not really possible since it’s way out of my price range.
In the meantime, roasting coffee is just something fun I do.
OK, time to go back to my writing.
TL;DR – I had many uneven roasts. I explain why American electrical equipment heat up slower than Australian ones. I experimented with a double roasting and the result turned out quite awesome. You should try it too if you’re an amateur roaster.
If you have tried my method – pre-warming the beans in the oven and then used an alternative methods, do tell me how it went?